


My Store
Dreamcast USBC Power Supply
Dreamcast USBC Power Supply
5.0 / 5.0
(5) 5 total reviews
Couldn't load pickup availability
***US customers – All import duties are included in the cost, there will be no additional fees to pay on delivery***
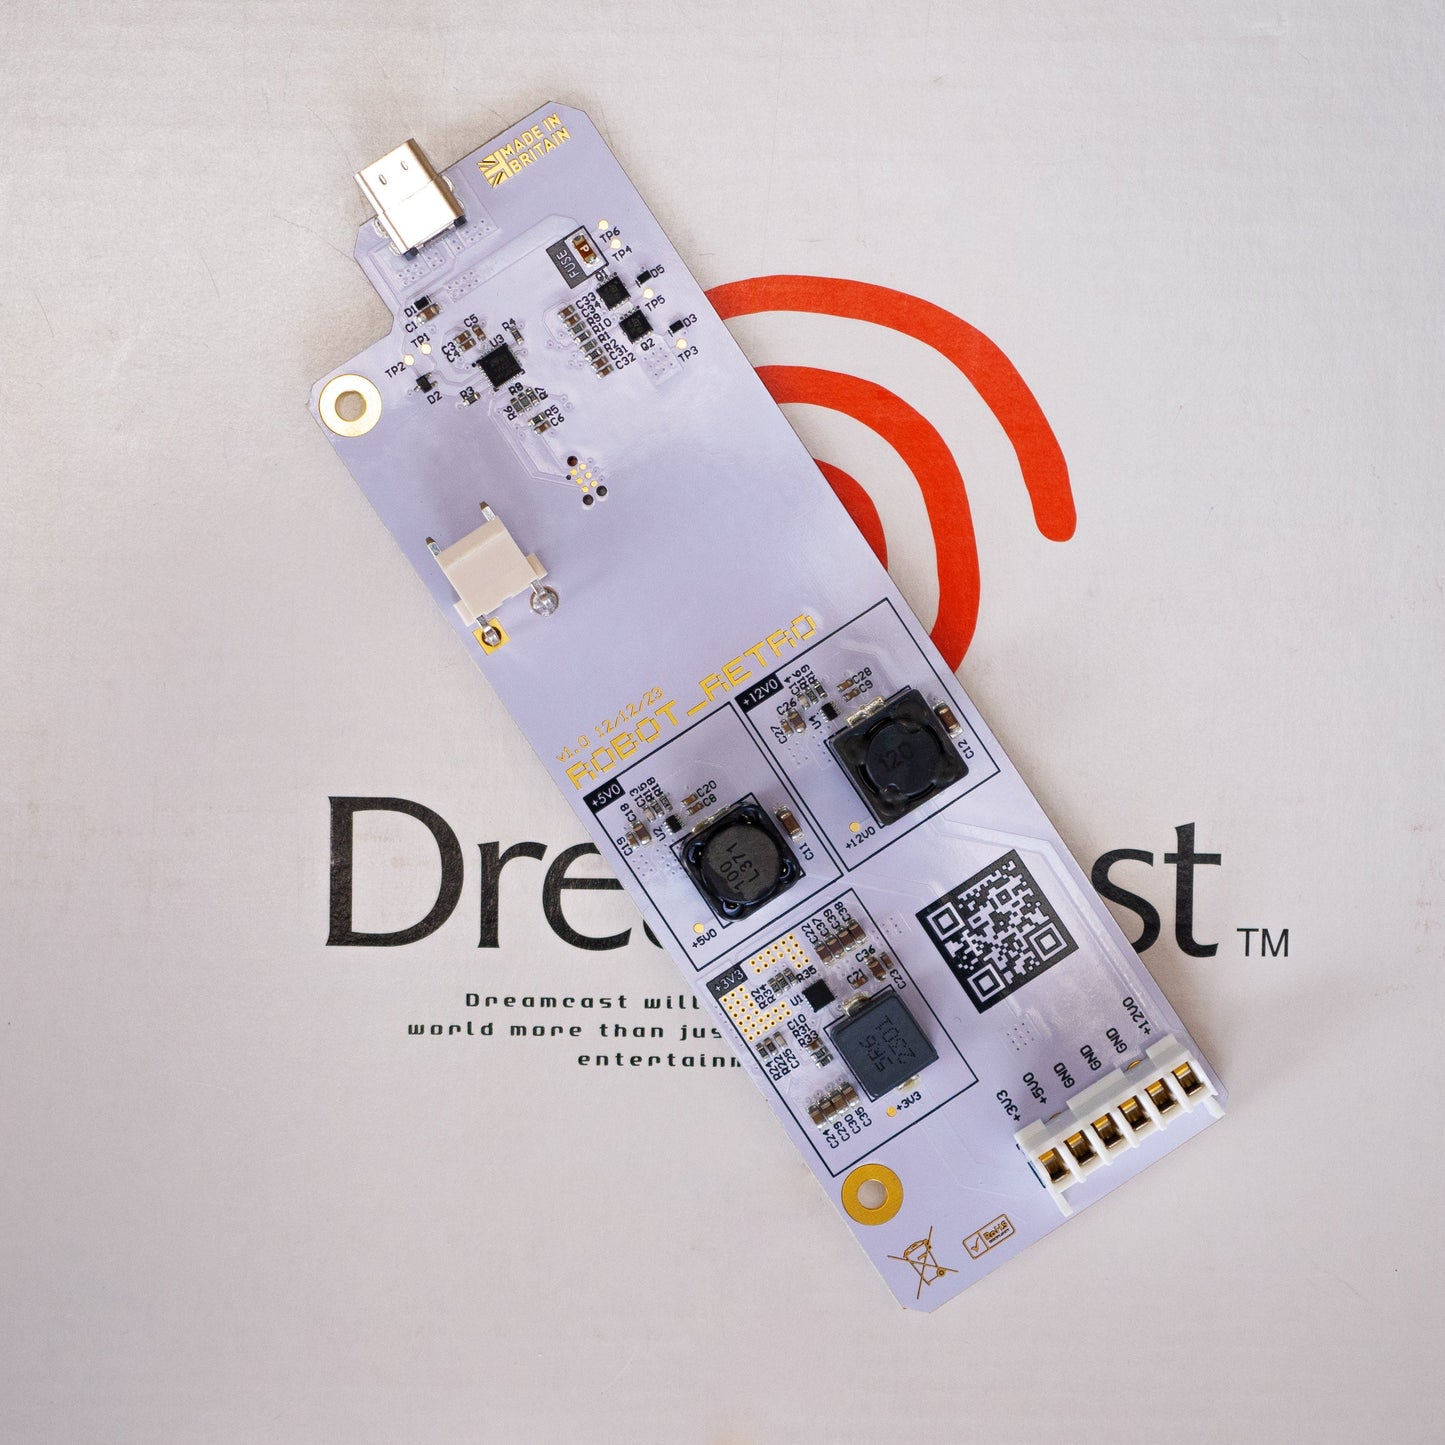
robot_retro Dreamcast Power Board – USB-C Drop-In Replacement
Version 1.1 – Now Includes 5V & 12V Fan Headers
Upgrade your Sega Dreamcast’s power supply with a modern, efficient, and solder-free solution. Designed to work seamlessly with all Dreamcast models and mods—including GDEmu, RetroGEM, and 480p SCART RGB setups.
Key Features
True Drop-In USB-C PSU Replacement
- No soldering, wiring, or modification required.
Universal Compatibility
- Works with all Dreamcast models (PAL, NTSC, Japanese).
- Fully supports GDEmu, RetroGEM, and RetroTINK-powered 480p SCART RGB cables.
High Efficiency & Low Noise
- Delivers between 90–95% efficiency under real-world loads.
- Low heat output and minimal signal noise—reduces video “fuzz” caused by noisy OEM power.
Safe and Reliable
- Built-in overvoltage, over-temperature, and fused protection to safeguard your console.
- Prevents damage caused by plugging 240V into a 110V Dreamcast.
Fan Support (v1.1 Update)
- Includes 5V and 12V fan headers for custom cooling setups.
- Note: The Dreamcast still requires a fan plugged into the OEM fan port for successful boot-up.
No LED Distractions
- Designed without flashing LEDs—ideal for use with clear shell builds.
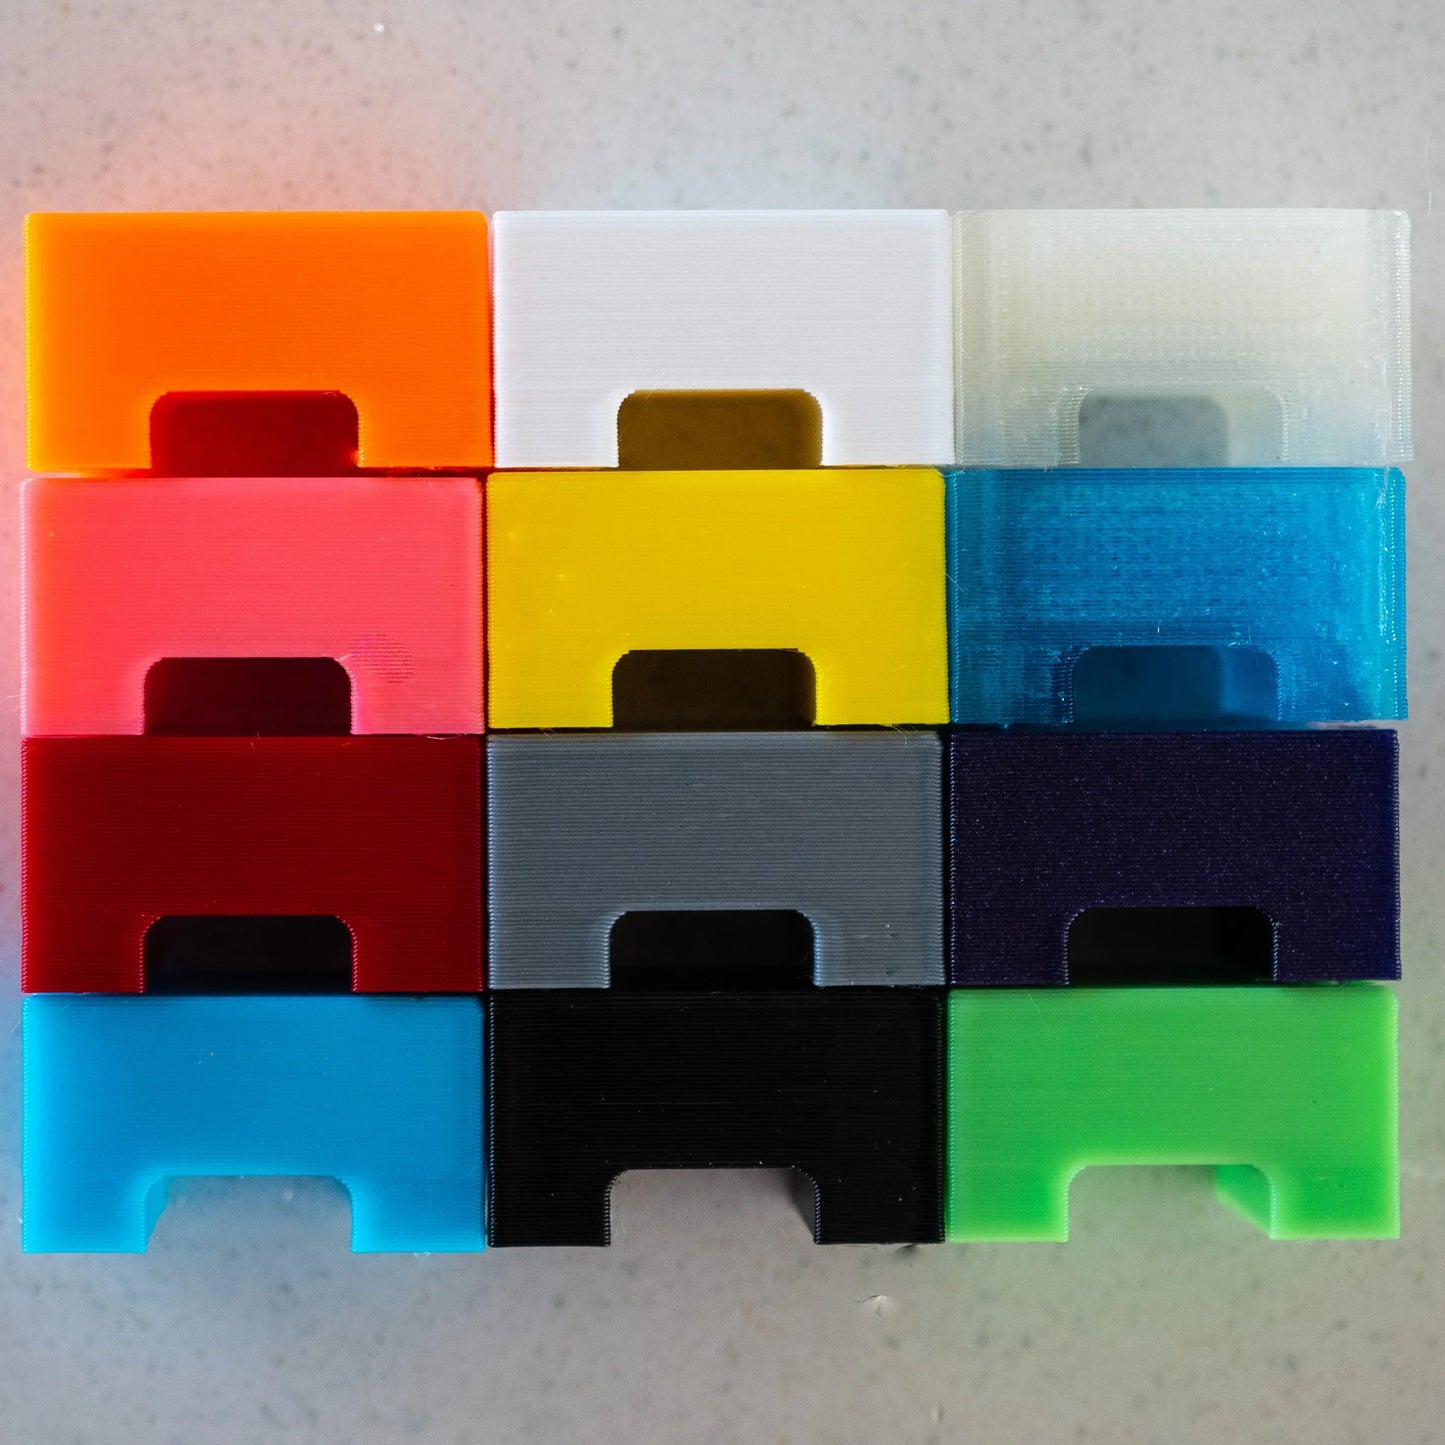
Multicolour 3D-Printed Spacer Included
- Provides a clean and secure fit in the Dreamcast chassis.
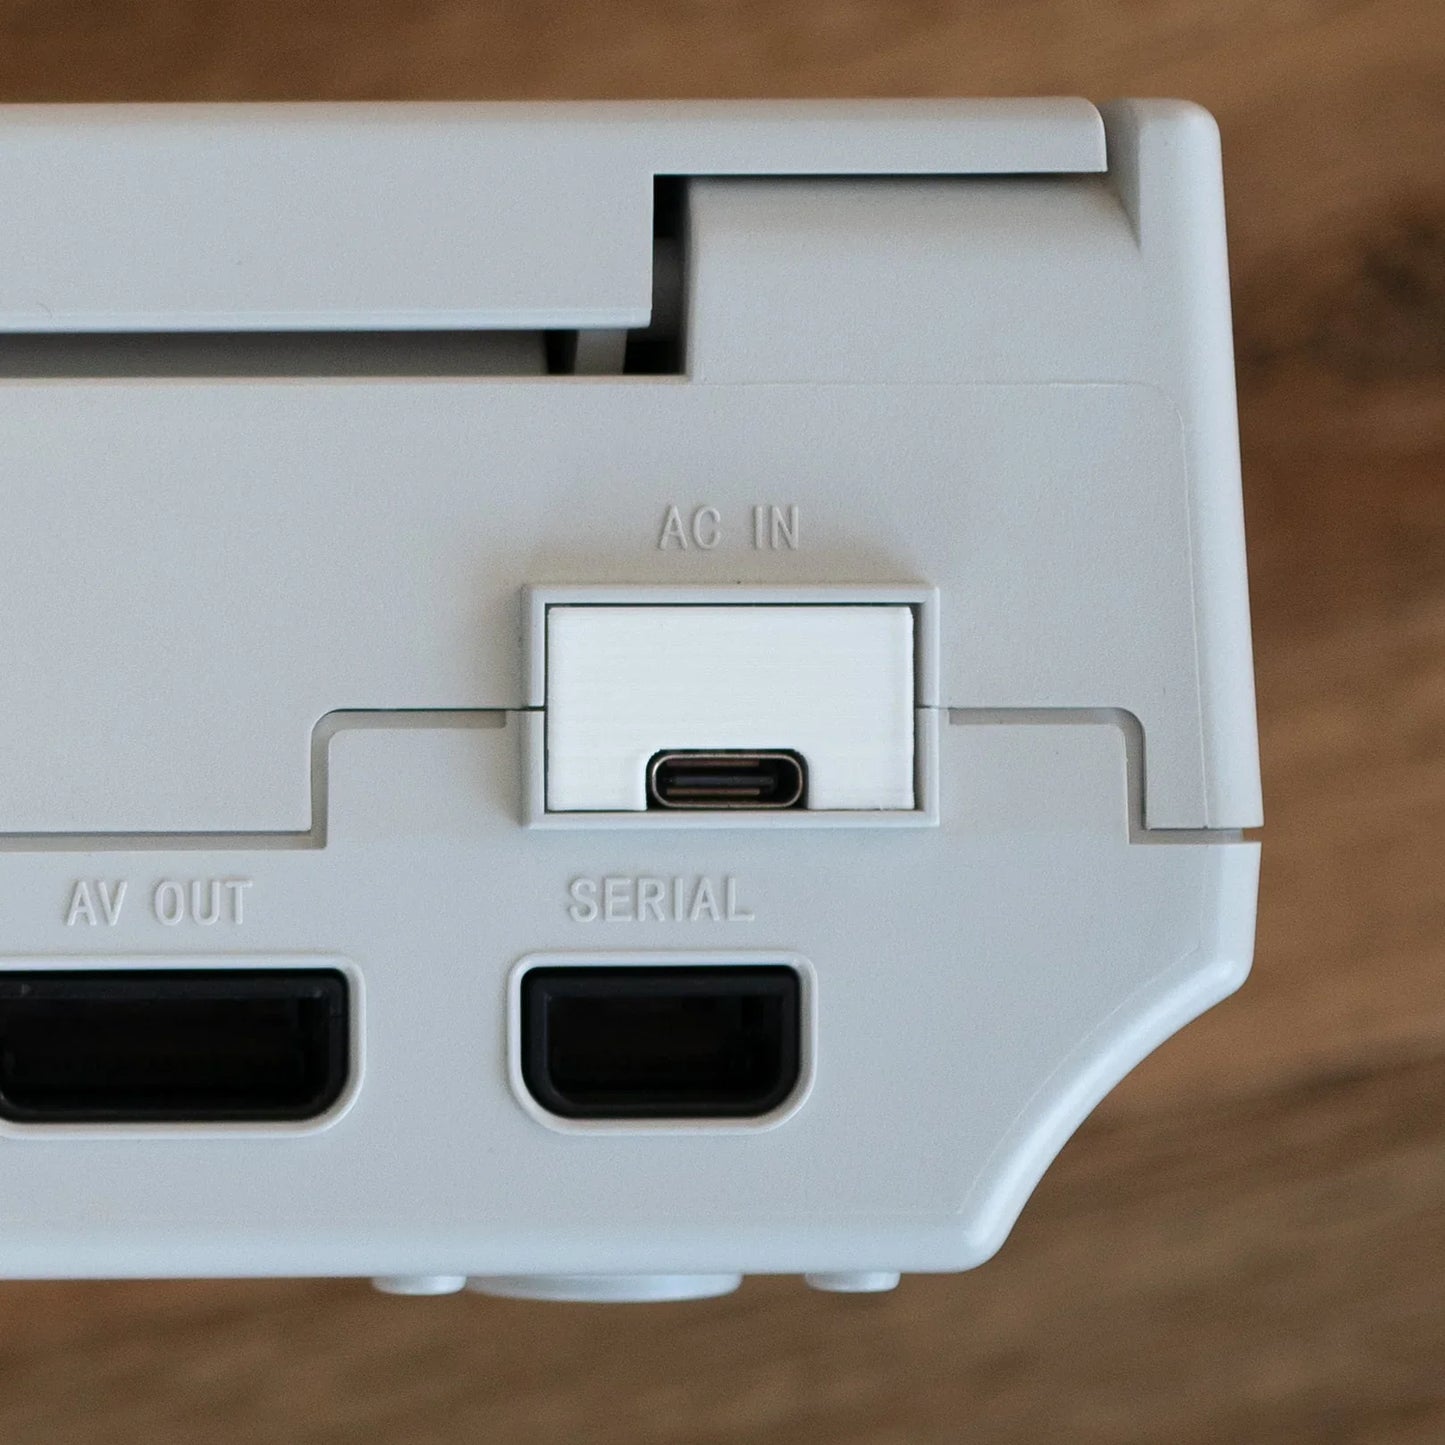
Power Requirements
Powered by a 15V or 20V USB-C Power Delivery charger. Most 30W PD chargers will work. Recommended models:
- uGreen Nexode Mini 30W
- Nintendo Switch Power Supply
- High-quality filtered chargers from Anker, Dell, uGreen, etc.
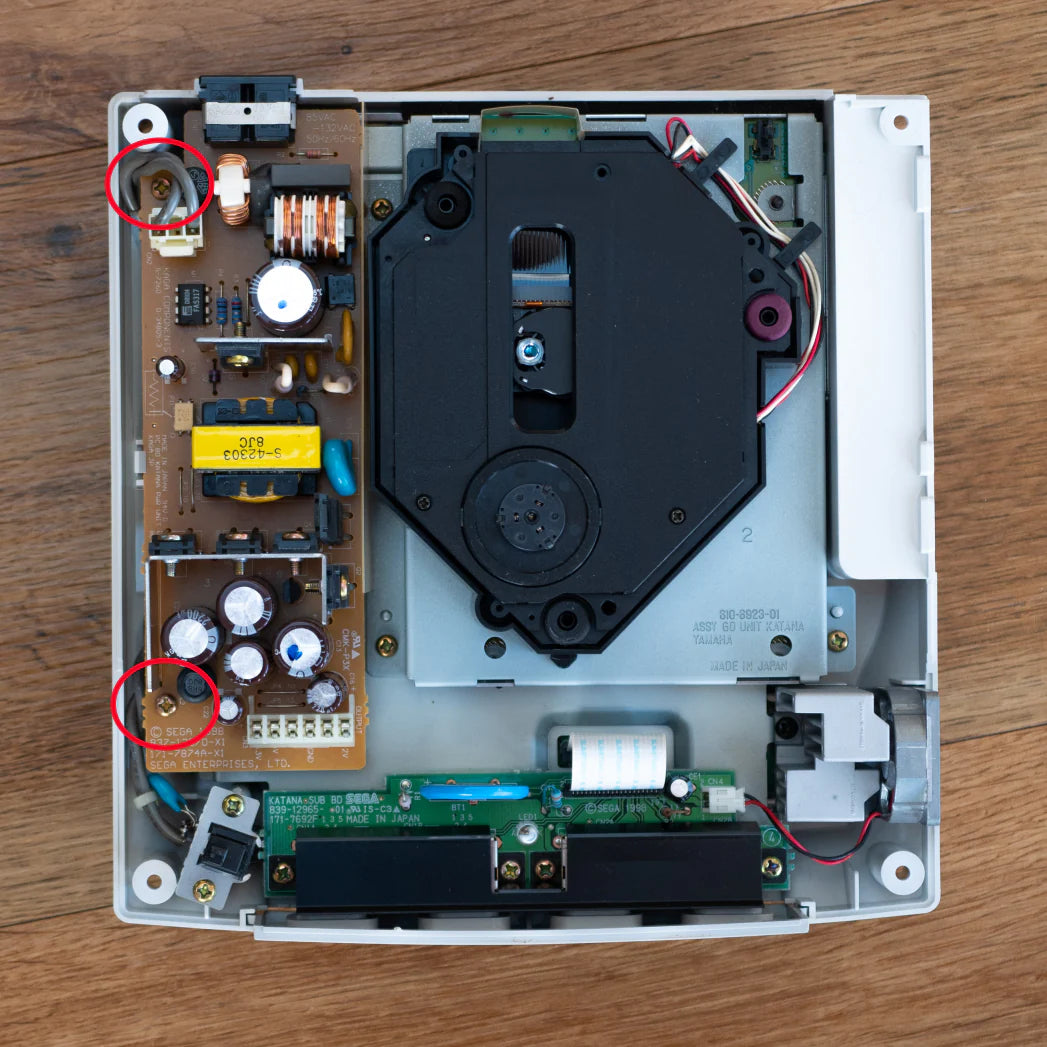
Why Replace the OEM Power Supply?
- The stock Dreamcast PSU is an aging AC-to-DC converter that's bulky, noisy, and inefficient
- Common issues include video interference (fuzzy output) and potential voltage mismatch damage—especially when using 240V UK power with 110V Japanese units
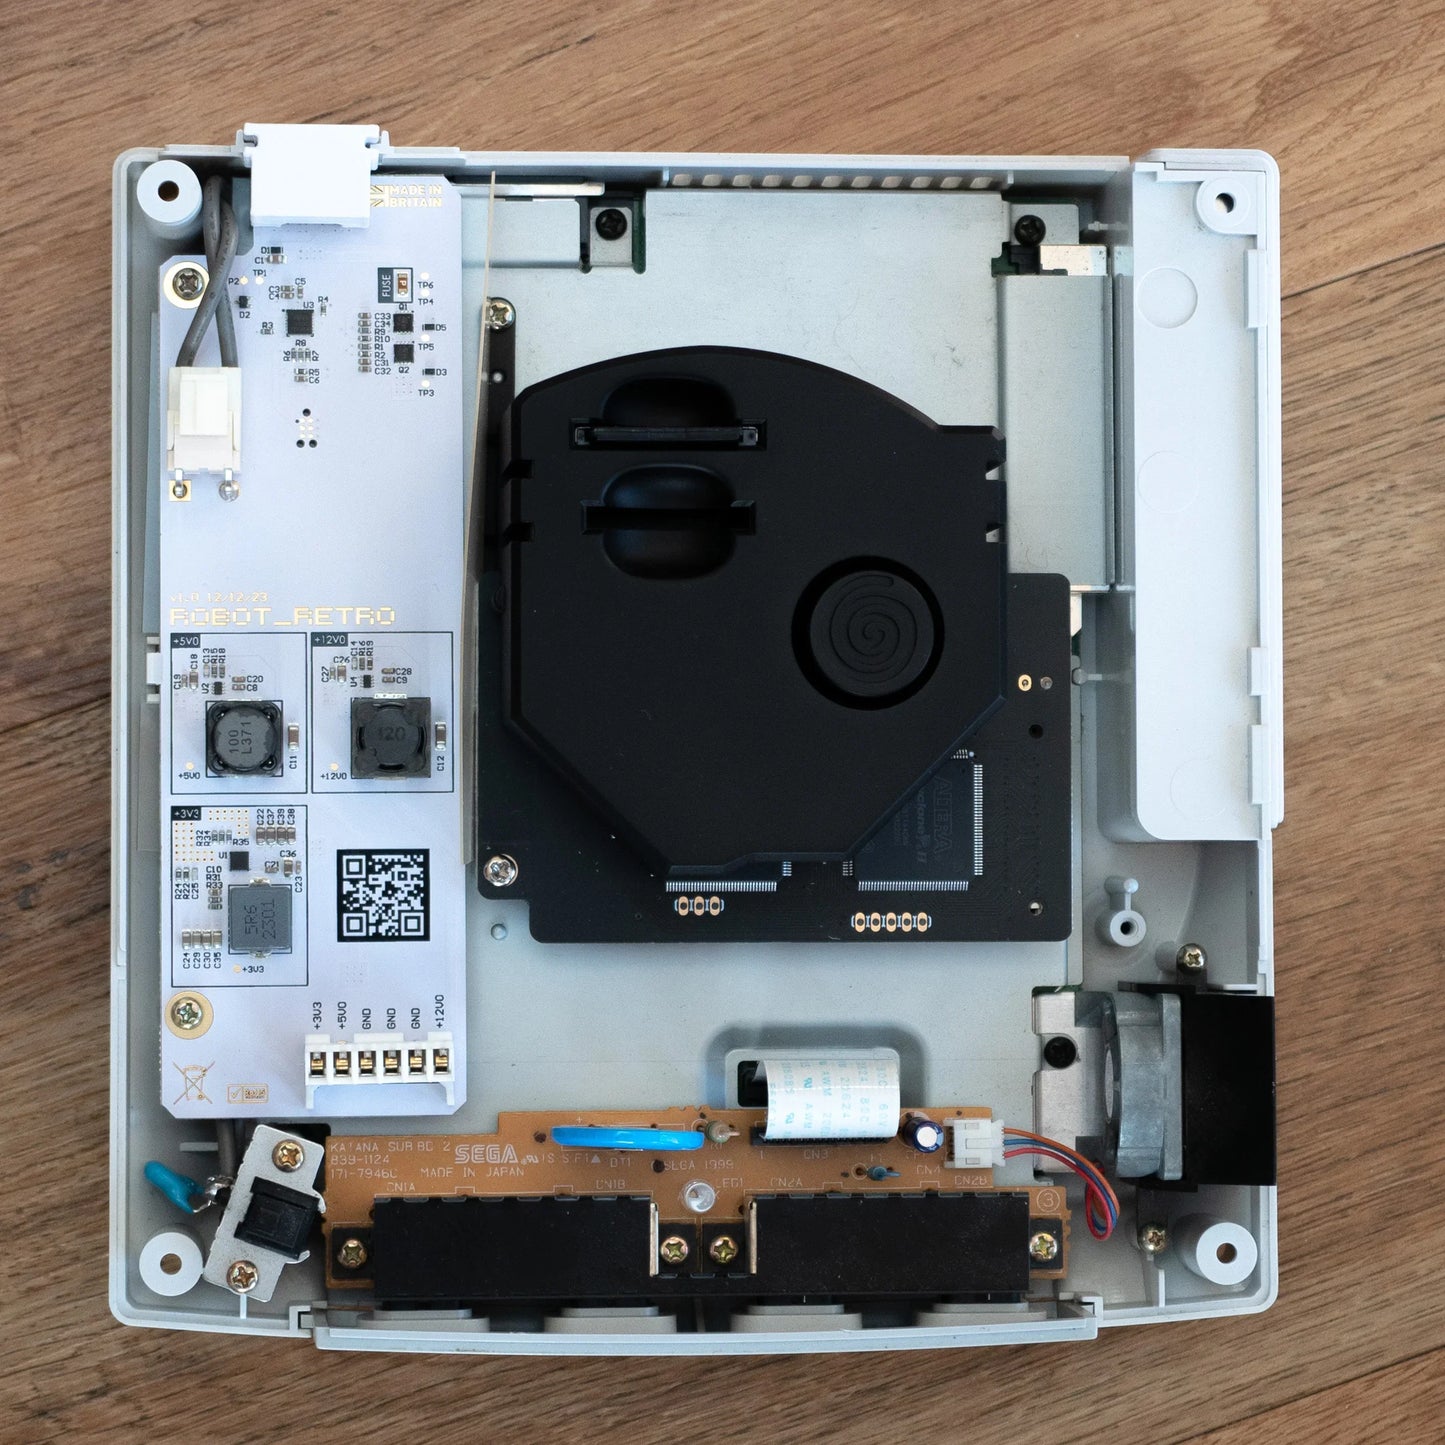
Install Instructions
Other 3D spacer colours can be printed from the files here.
See tutorial and reviews from JoeBleeps and from Macho Nacho Productions.
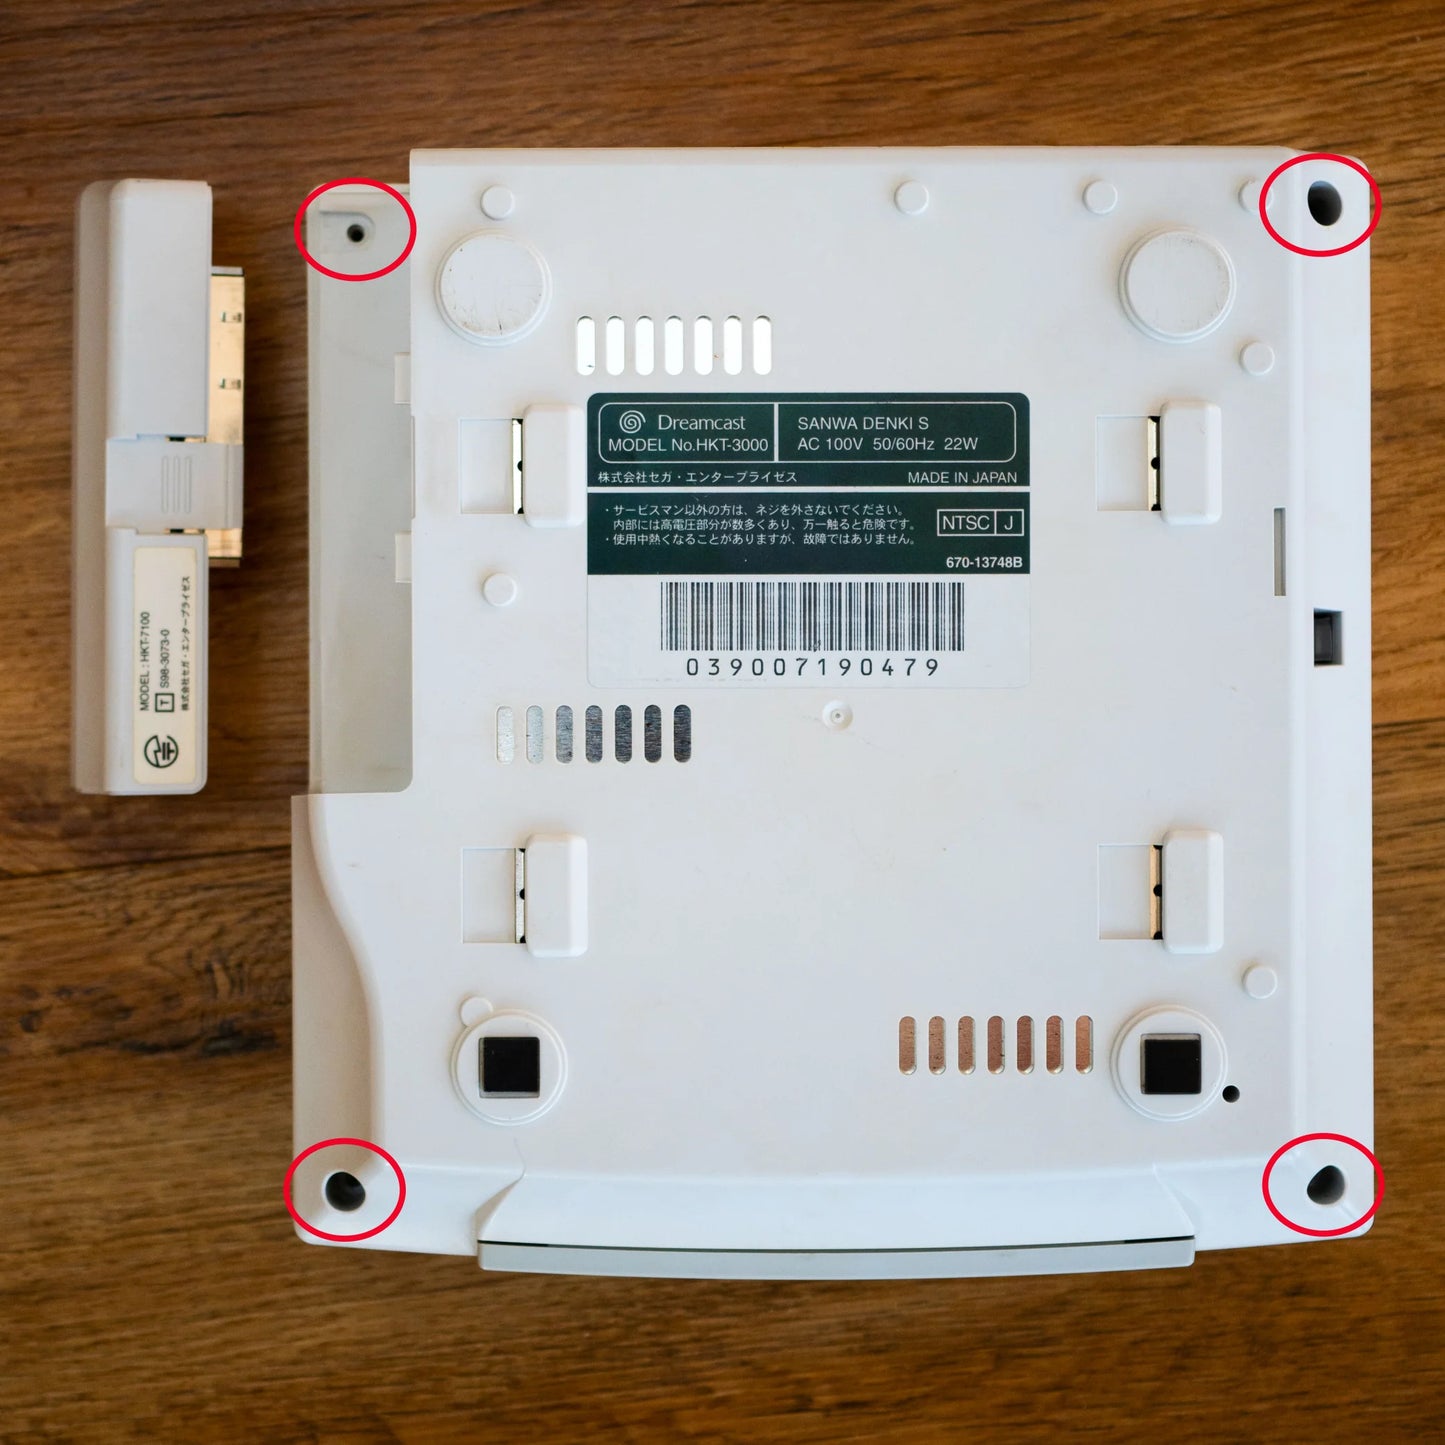
- Unscrew the four bottom Dreamcast screws as shown in the photo.
- Remove the top lid and then remove the two power board screws (see photos).
- Fit the robot_retro board in exactly the same way as the OEM power board was removed.
- Fit 3D printer USBC spacer.
- Button up the console.
Share
Easy to install and works great.
Works great, easy to install, and causes way less video noise than other replacement power supplies that I've tried.
Clean, amazing upgrade
Helped resurrect my Dreamcast from the dead!
I got my package super fast and installed it into my Dreamcast on the same day. My first impression of the PSU was great. It’s really well-made, it’s a shame it has to be hidden inside the Dreamcast. Ugreen USB-C and mini HDMI for a clean look.