


My Store
Playstation 1 USBC Power Supply (PSX, PS1, Fat)
Playstation 1 USBC Power Supply (PSX, PS1, Fat)
5.0 / 5.0
(12) 12 total reviews
Couldn't load pickup availability
***US customers – All import duties are included in the cost, there will be no additional fees to pay on delivery***
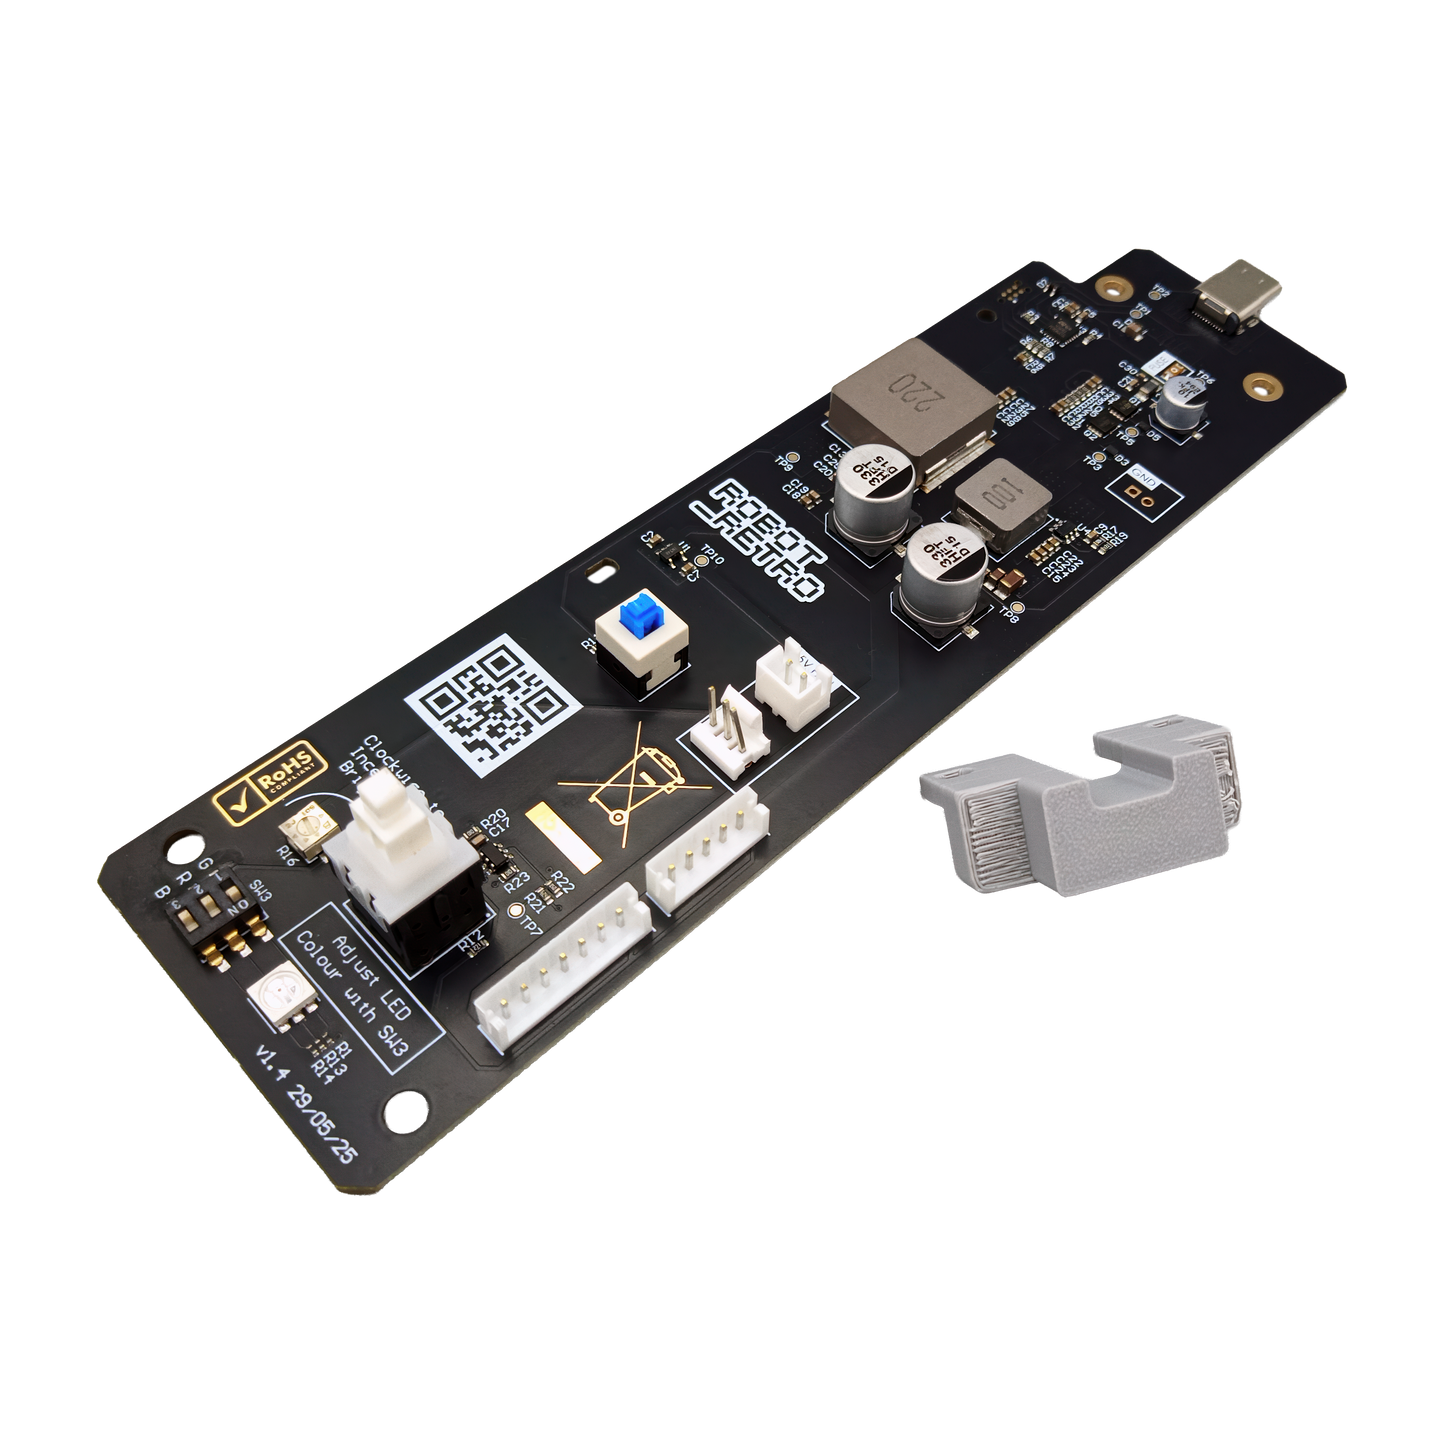
robot_retro PS1 "Fat" Power Board – Key Features
Drop-in USB-C PSU Replacement
- No soldering or wiring required—simply install and play.
Universal Compatibility
- Works with all PS1 models (PAL, NTSC, Japanese), xStation, MemCard Pro, and more. Supports both 5-pin and 7-pin connectors for full revision coverage of the original “Fat” PS1 console.
- Works with Picostation and its in game reset mod.
- The Xstation in game reset mod is not supported at this time.
High Efficiency & Low Noise
- Delivers up to 96% efficiency at typical loads. Ripple tested at ±5mV across all voltage rails for low noise and minimal heat generation.
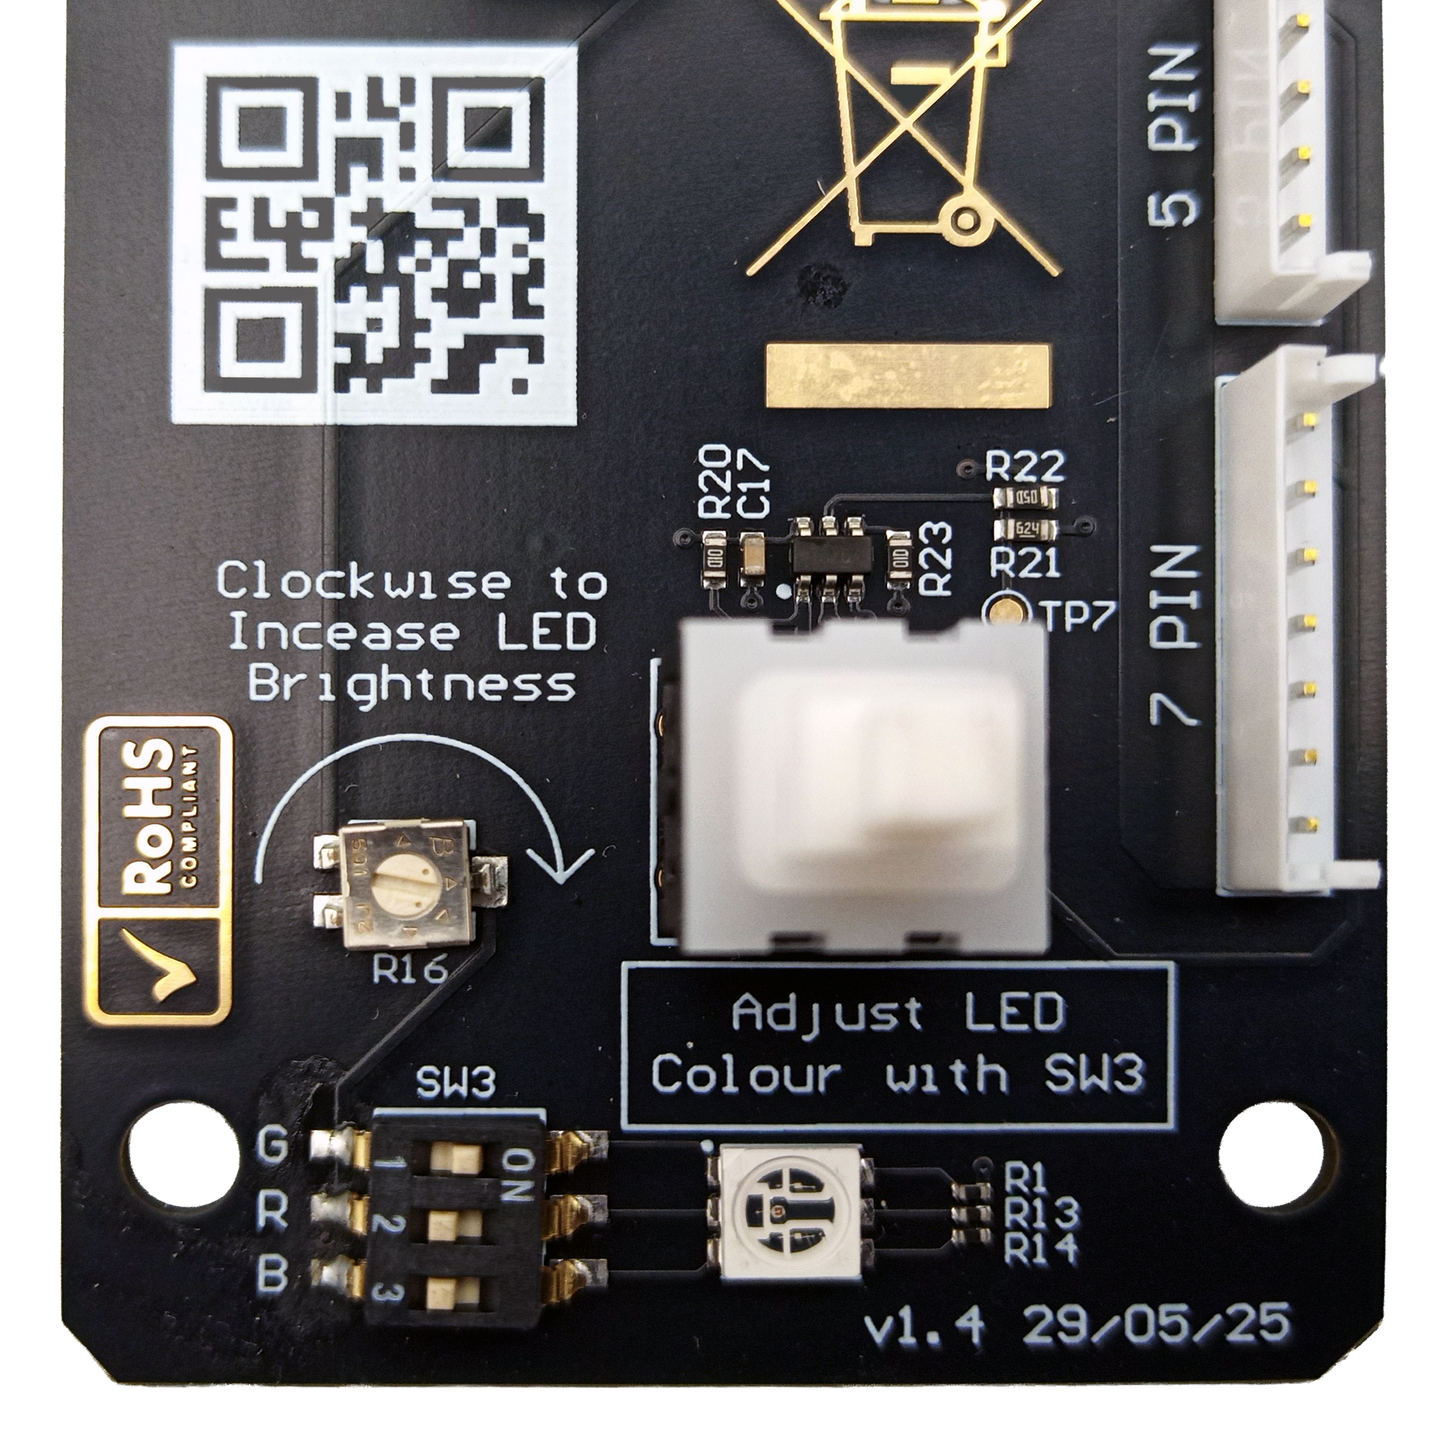
Fan Support
- Includes 5V fan headers for improved cooling options.
Customizable Power LED
- Select from a range of LED colours with adjustable brightness.
What Sets the robot_retro Power Board Apart
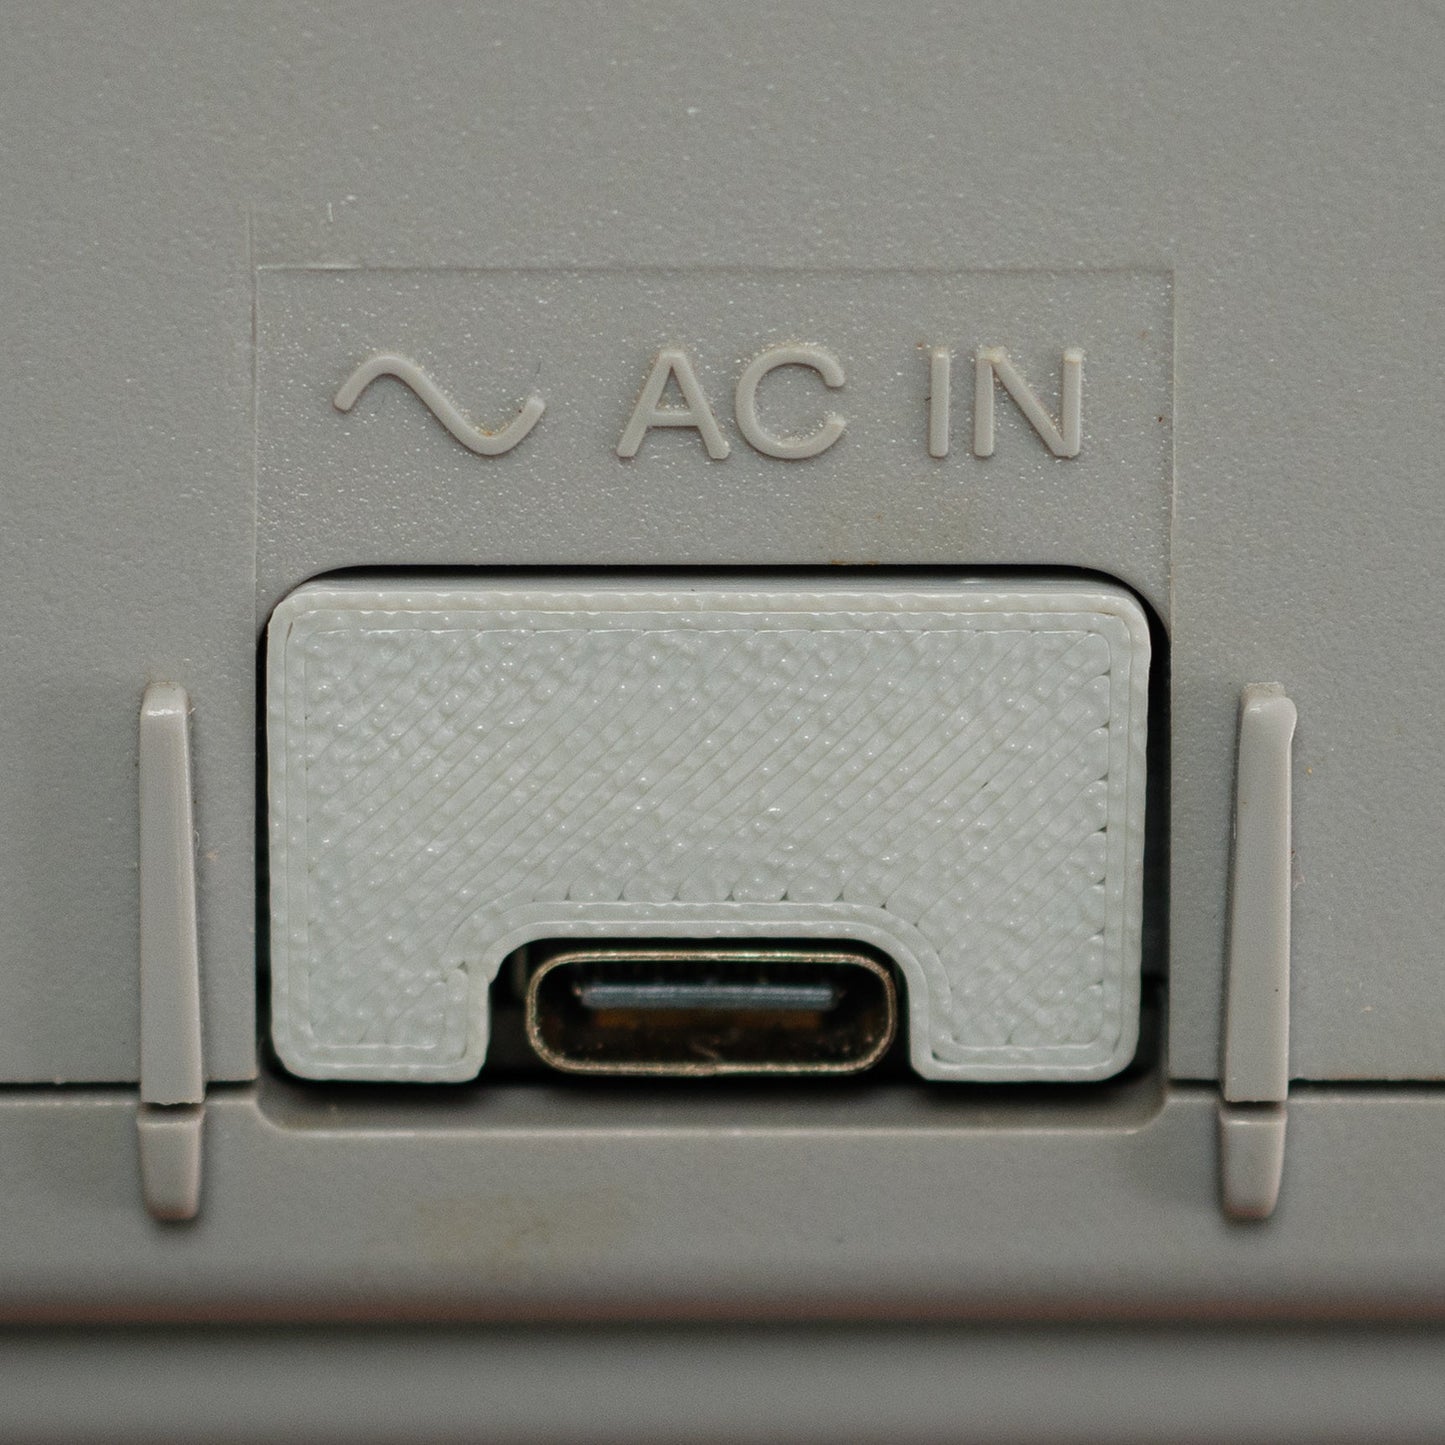
Powered by USB-C PD (Power Delivery)
- Compatible with 15V or 20V PD chargers. Most 30W USB-C adapters will work, including models from Anker, Dell, uGreen, and the official Nintendo Switch charger.
Recommended: uGreen Nexode Mini 30W or Nintendo Switch Power Supply for optimal quality and value.
OEM-Matched Reset Logic
- Power-on delay timing matches the original Sony board to ensure flawless performance and compatibility.
Safe and Reliable
- Built-in protection against overvoltage and includes a fused input for peace of mind.
Region Protection
- Prevents damage caused by incorrect mains voltage (e.g., plugging 240V into a 110V system).
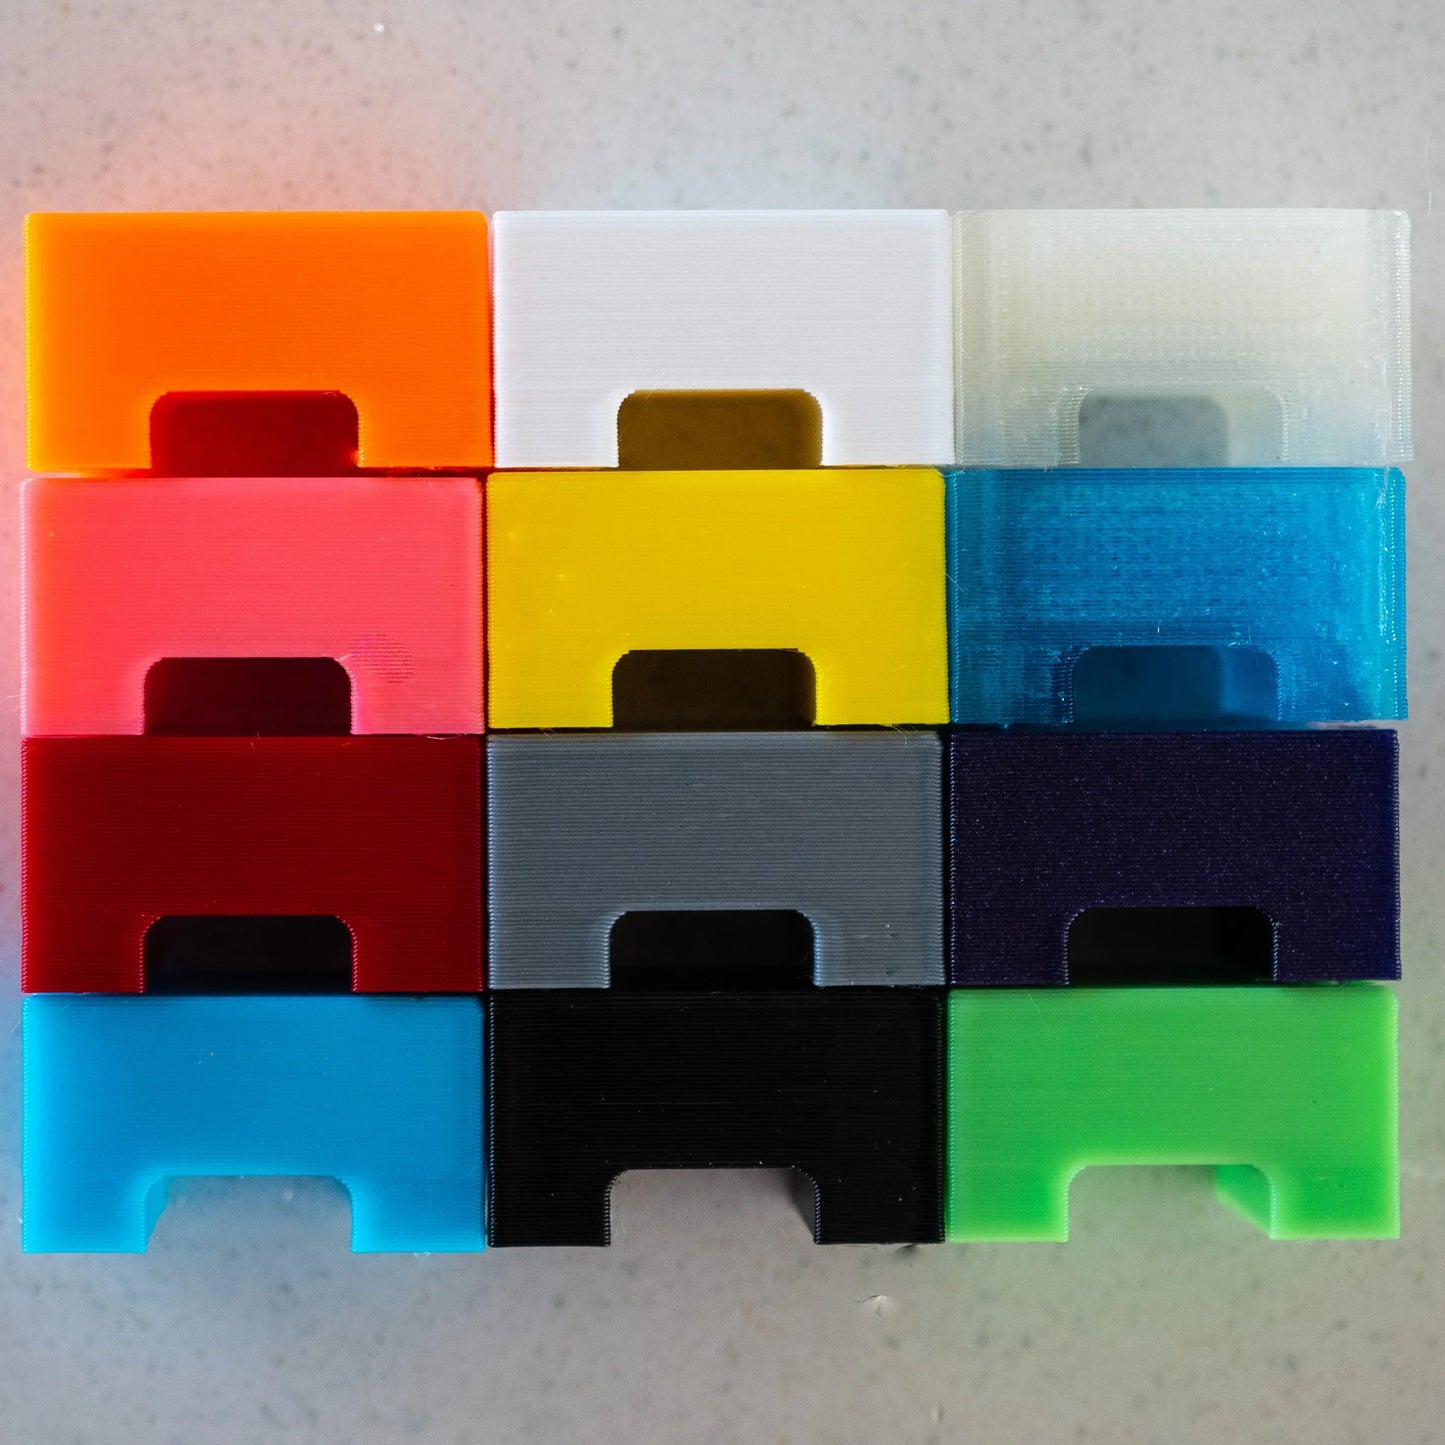
Aesthetic Touch
- Comes with a multi-coloured 3D-printed spacer. Additional colours available via downloadable STL files.
Installation Instructions
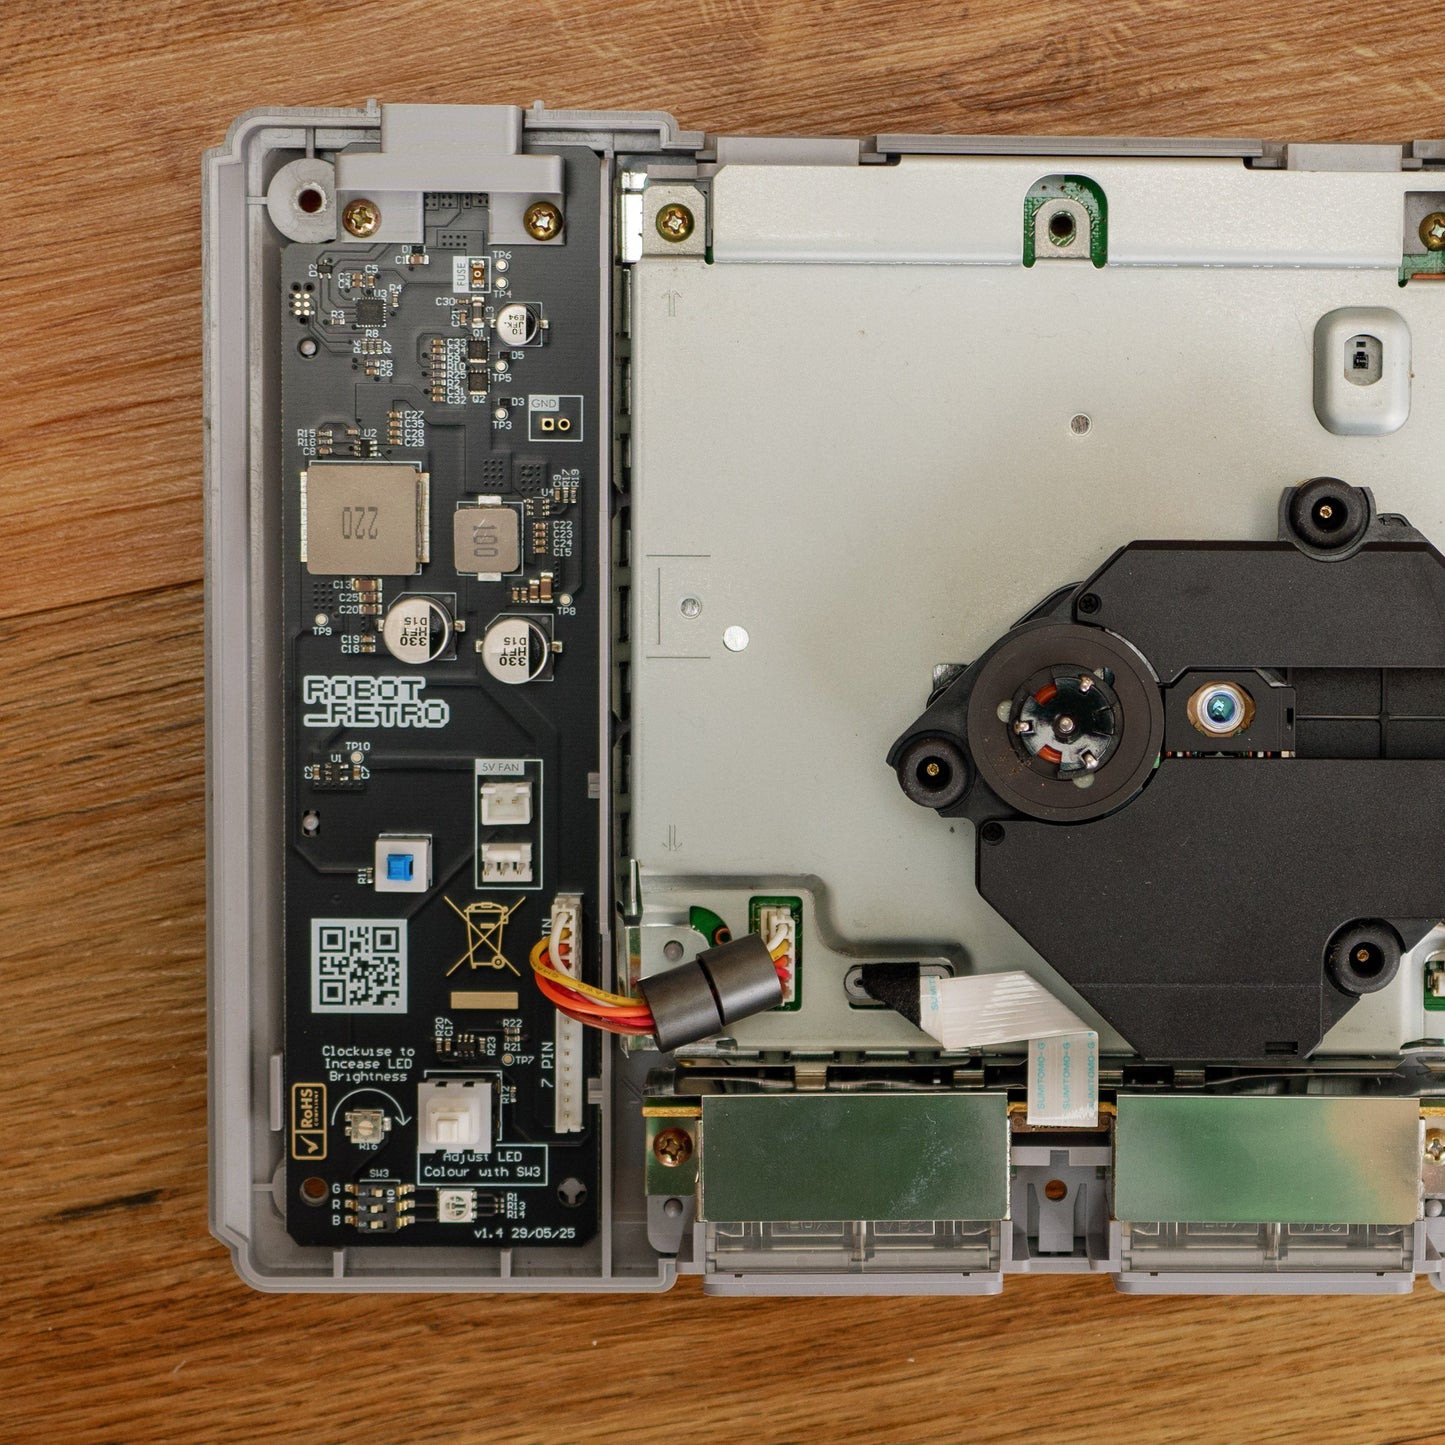
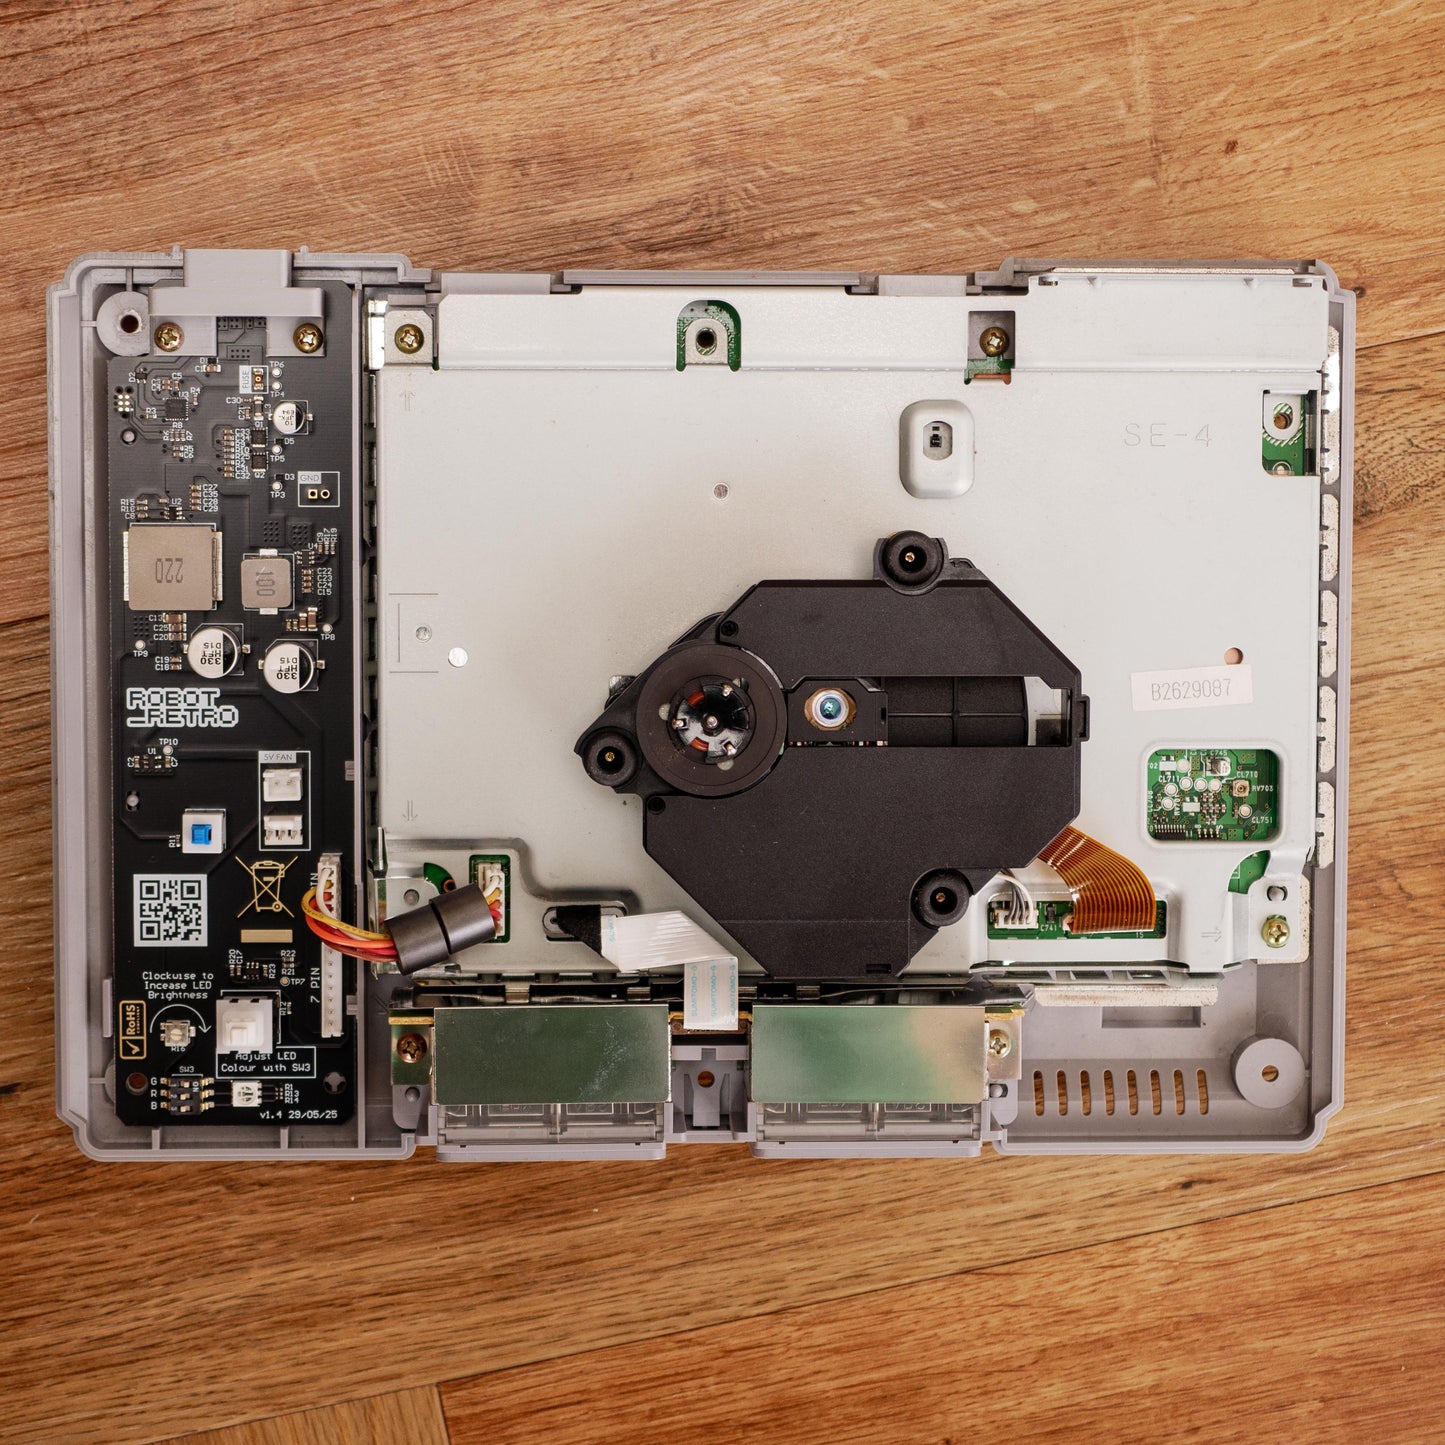
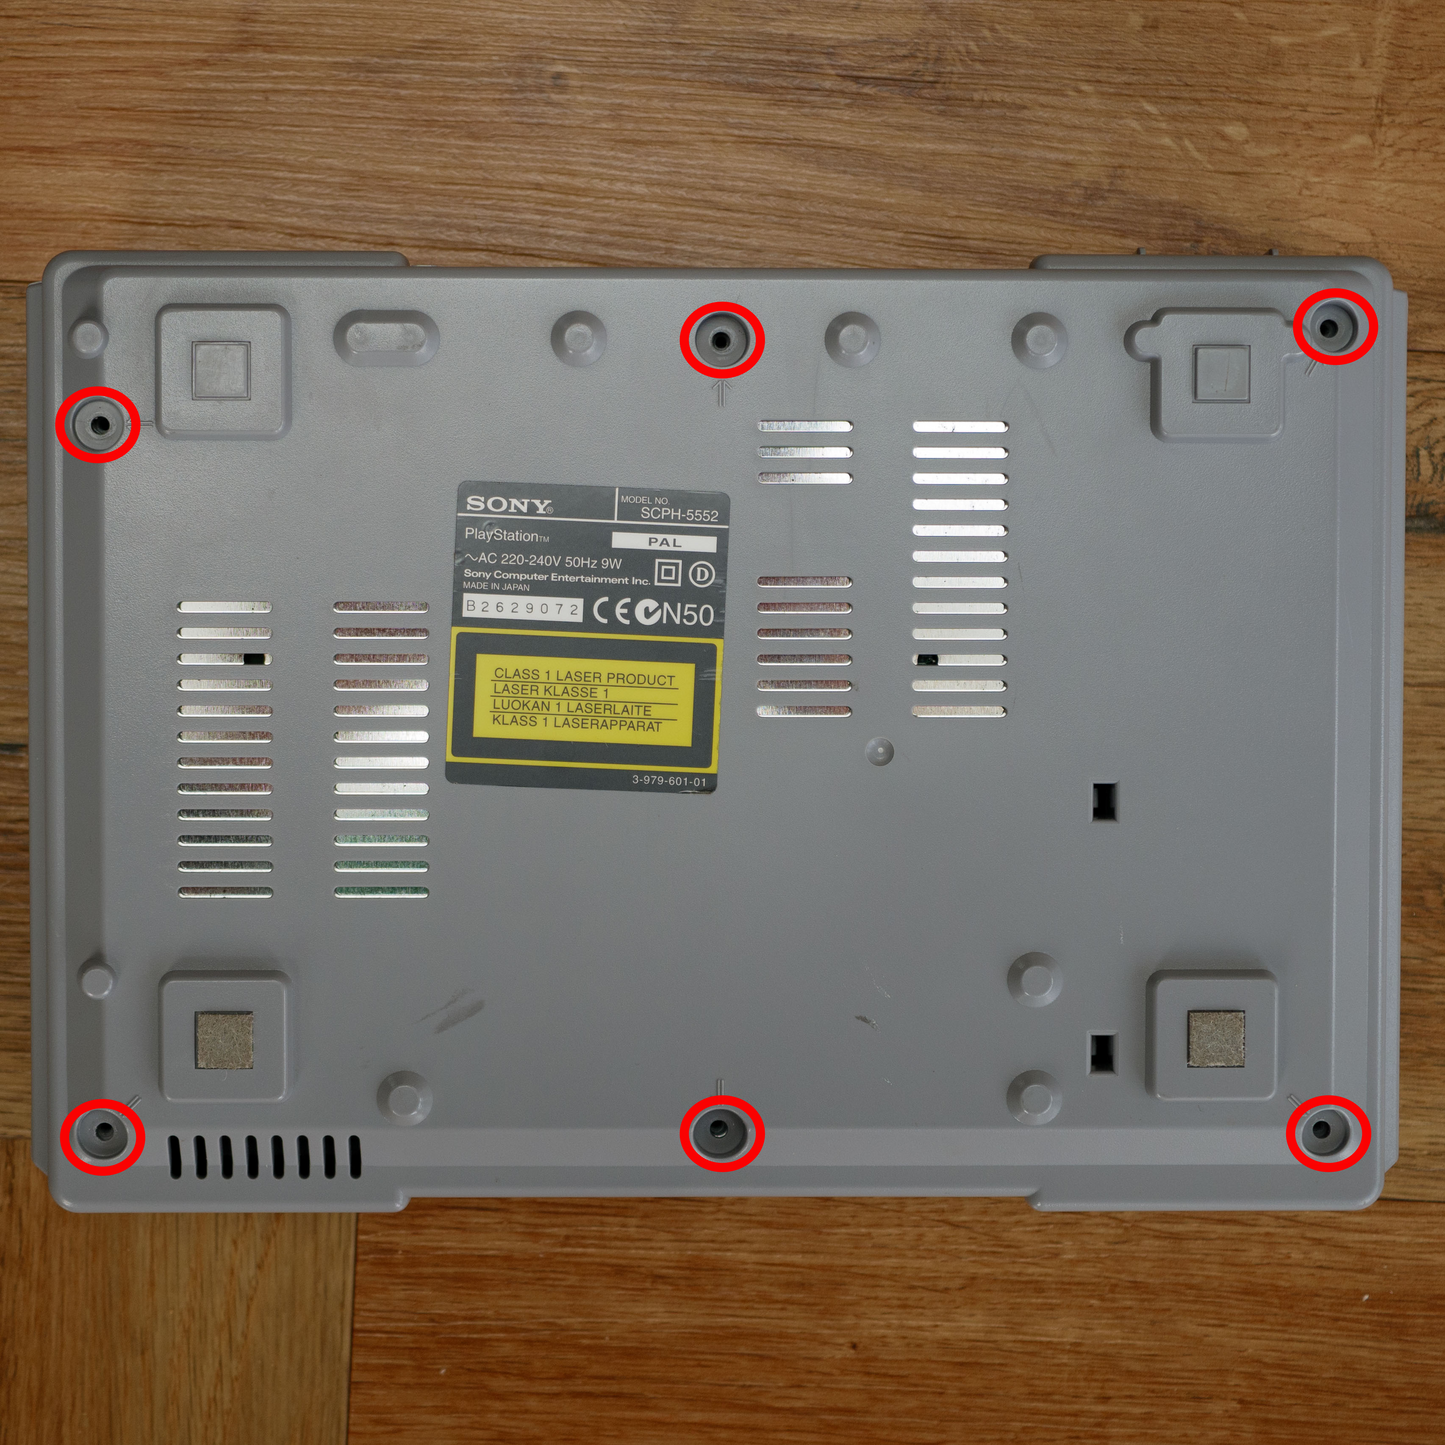
I recommend a Phillips #2 screwdriver is used for the install.
- Unscrew the six screws on the bottom of your PS1 (see photo).
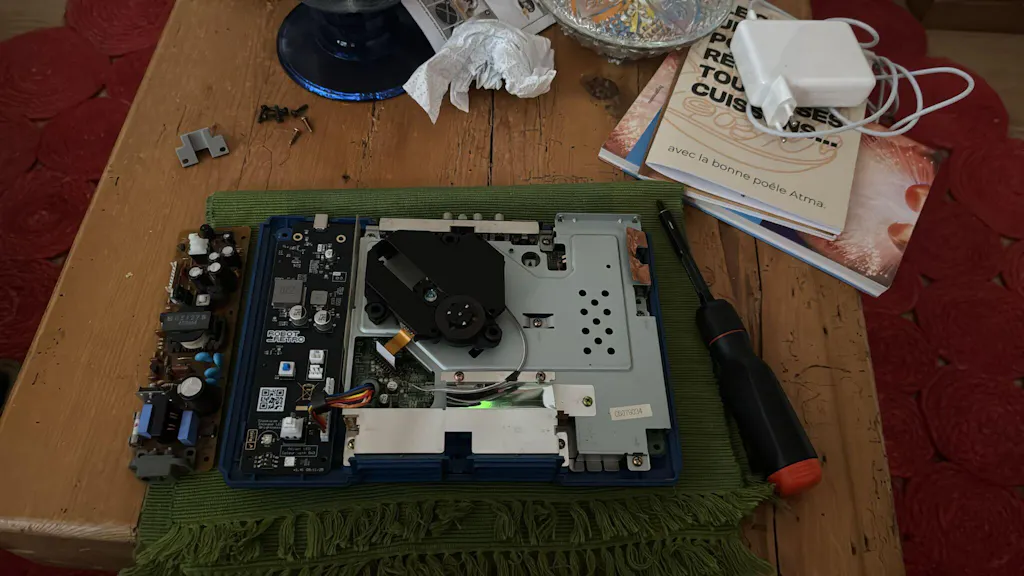
- Remove the top lid and unscrew the two power board screws.
- Fit the robot_retro board in the same position as the original power board.
- Install the provided 3D-printed spacer and replace the two power board screws.
- Reassemble your console.
Share


It's amazing, thank you so much!!
Totally recommend these boards! Installation is really quick, tested on a PU-18 and PU-22.
Arrived fast and works great. Best aftermarket PSU you can get, worth the price.
Really great stuff, only one piece offeedback, either I didn't read it properly, or the information was not self evident, that the units brought a grey cover by default, otherwise I wouldn't have bought 3 extra black ones. Besides that, the product is awesome!
This power supply is great. It's a drop in replacement that works perfectly.
Great for the price and I would definitely recommend it to anyone wishing to Mod their PlayStation 1.